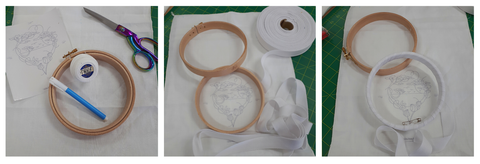
In my last blog post, I introduced this beautiful project that I wanted to stitch on. Now I'll explain a bit about the supplies and preparation for stitching. As mentioned previously, I wanted to try DMC's Magic Paper and ran it through my printer to print the design, rather than try to trace it using alight box or window.
Here's what I collected (excluding needles and embroidery floss):

(left) Supplies; (centre) Getting ready to wrap the hoop; (right) Inner hoop wrapped
=== split content ===
6" EXTRA THICK (7/8") HARDWICKE MANOR HOOP
=== split content ===
Magic Paper
=== split content ===
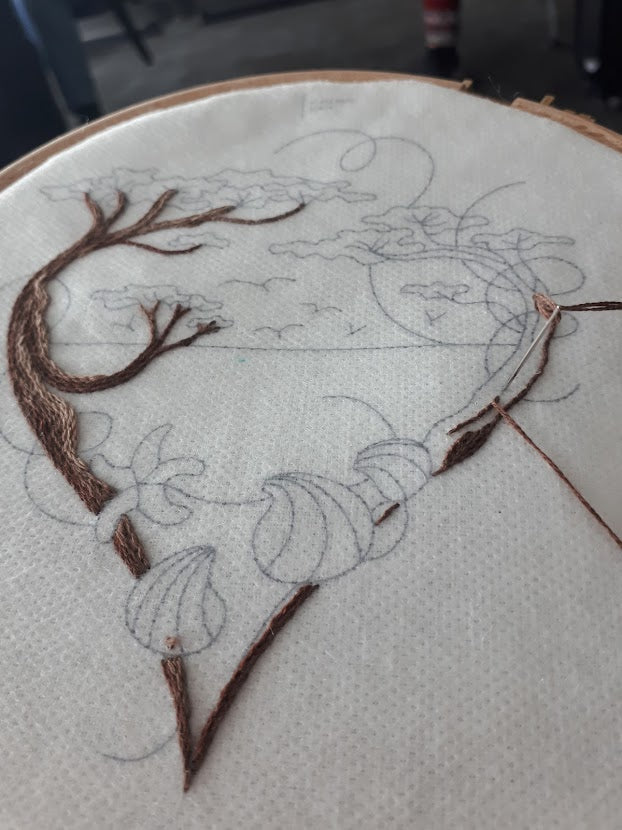
I'm using a beautiful Hardwicke Manor hoop, extra-thick. I wrapped it with a 100% cotton twill tape. I marked the fabric with the washout (blue) marker so the design would be attached exactly where I wanted. There were registration marks on the pattern. The Magic Paper has a peel-off backing and it smoothed easily into place, the edges sticking just right. I then hooped the fabric and prepared to start stitching. Below is my progress on Day 1:

I started on the branches - stitching closely-spaced rows of stem stitch, starting with the darkest shade on the outside of the branches.
And Day 2:

I've continued with the stem stitch branches, adding in lighter shades as I stitched towards the inside of the design. It was a bit challenging deciding the flow of lines for the thicker/bumpy parts of the branches and working thin lines for the twigs.
I'll continue to document my progress - I'm having such a wonderful time stitching this lovely piece - just enough challenge to keep it interesting, small enough to prevent boredom, and I'm loving the way it is turning out.

