I've long been in love with Reticella/Reticello. I just didn't know what it was called. I kept seeing this lovely piece of stitching featuring a spray of flowers stitched over an openwork trellis on the Internet, but with no reference I could find.
Here are the images that inspired me:

After being asked to bring in some lovely embroidery books by Elisabetta Sforza by a customer, I was approached (via email) by a man named Vito, explaining he was the husband of the late Giuliana Buonpadre, a good friend of Elisabetta's. He suggested that since I had ordered Elisabetta's books, I might be interested in carrying Giuliana's books too.
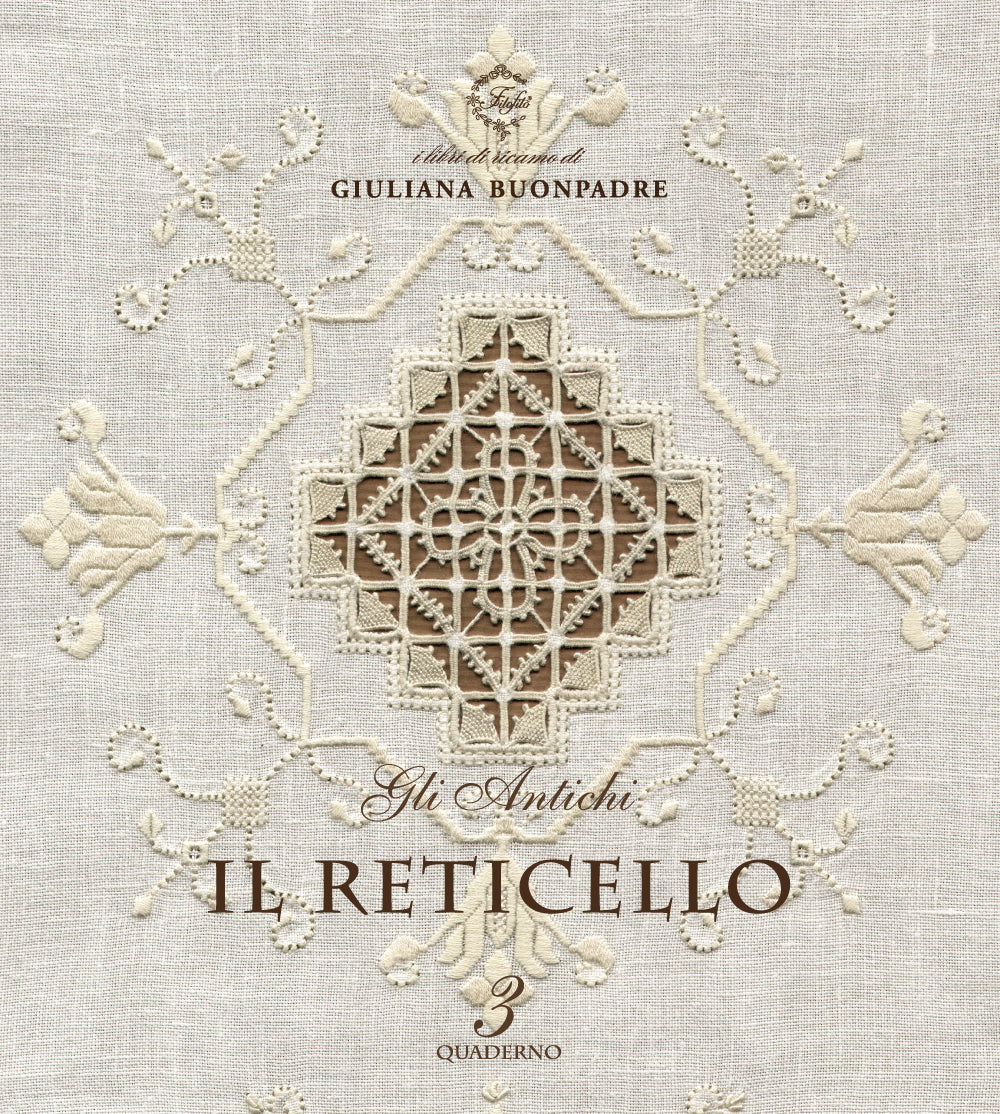
Well, big surprise. When I looked at Giuliana's books on her website, lo and behold there was the same image of stitching that I had long admired! It was her design!
Needless to say, I had to bring in the books. The image in question was in Volume 9 Herbarium. Vito recommended starting reticella with Volume 3 - Il Reticello to give a better or more solid base, then progressing to Volume 5 - Fior di Reticello before attempting Herbarium - although an experienced stitcher could just jump right in - which I usually do, but this time I thought I'd start a little ways back.
I'm inviting fellow stitchers to join me in my reticello journey. I'm starting now, with two introductory motifs I plan to finish sometime this summer. Join me by emailing to info (at) thestitchersmuse (dot) com.
So here starts a little MAGIC!
Last week, I spent a bit of time deciding on fabric and threads. I wanted to use some Presencia Finca #16 pearl cotton that I haven't played with yet: colour 1889 Medium Melon and colour 1895 Dark Melon, which I accidentally over-ordered for Hazel Blomkamp's Nigel the Flamingo via a customer's request. The only fabric we had in stock in the right count (about 28 threads per inch) was our Weberei Weddigen 30 ct Soft White linen. I randomly cut off a piece I could see as being finished into a drawstring bag or something similar. It straightened an edge and wasn't measured at all before cutting. As I played with folding and refolding, imagining the finished bag and where I should place the two motifs I had decided to start with. From a drawstring bag it turned into a folio or project envelope so the motifs would have full exposure. After folding it into what I felt was the finished shape, I randomly placed the book I'm working from, Il Reticello, close to the folded fabric. Glancing at it again, I realized that the folded piece of fabric WAS A PERFECT FIT FOR HOLDING THE BOOK!
Serendipity?
Anyhow, here are some photos of my start:
This is the initial piece I cut: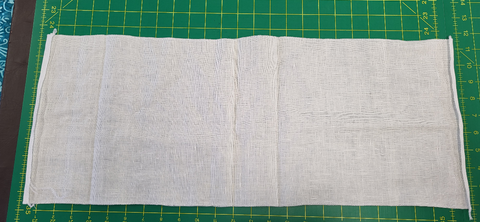
Here it is folded as I thought to finish it:
Here's what happened when I laid the book on top - see the MAGIC?
Marking the centre front for placing the Main Image (the one you see in the middle of the book cover). I folded just the exposed part in half in both directions, then marked it with a wash-out marker: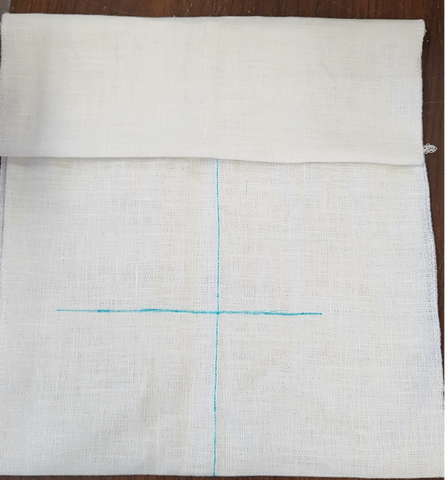
And centre back - this will be where the small motif will be placed - the first trial of working reticella: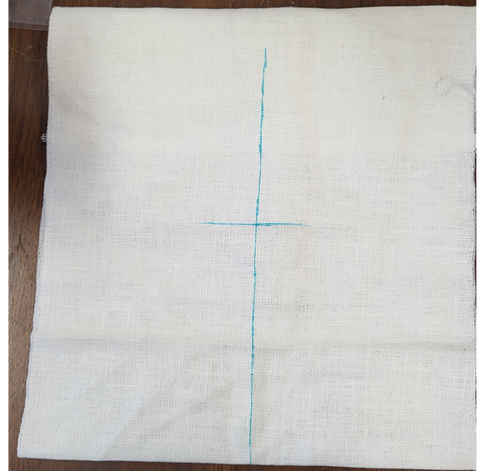
These are the two motifs I plan to start with - the square one will be in the centre of the back, and the larger one (without the extra satin stitched scrolls) which will be in the front: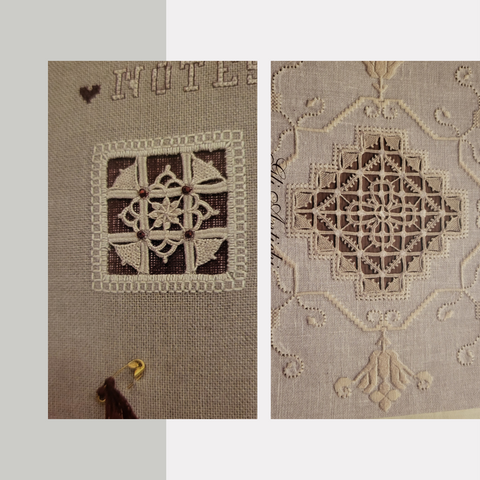
So what's the challenge for other stitchers to stitch along with me? I'm starting with the basic outline of these two motifs, but then I am going to sketch out the grid, and see which of the many, many fillings Giuliana has diagrammed in the book and fill the empty squares with something fun!
Stay tuned for updates - I'll be showing my progress with withdrawing threads, stitching the outlines, and playing with the grids. Want to come along on the journey? Email me at the shop or phone in - I'm starting a special email group for interested people, and I'll also be posting in The Stitcher's Muse's Facebook Page and Group.
I'm going to have some fun!!